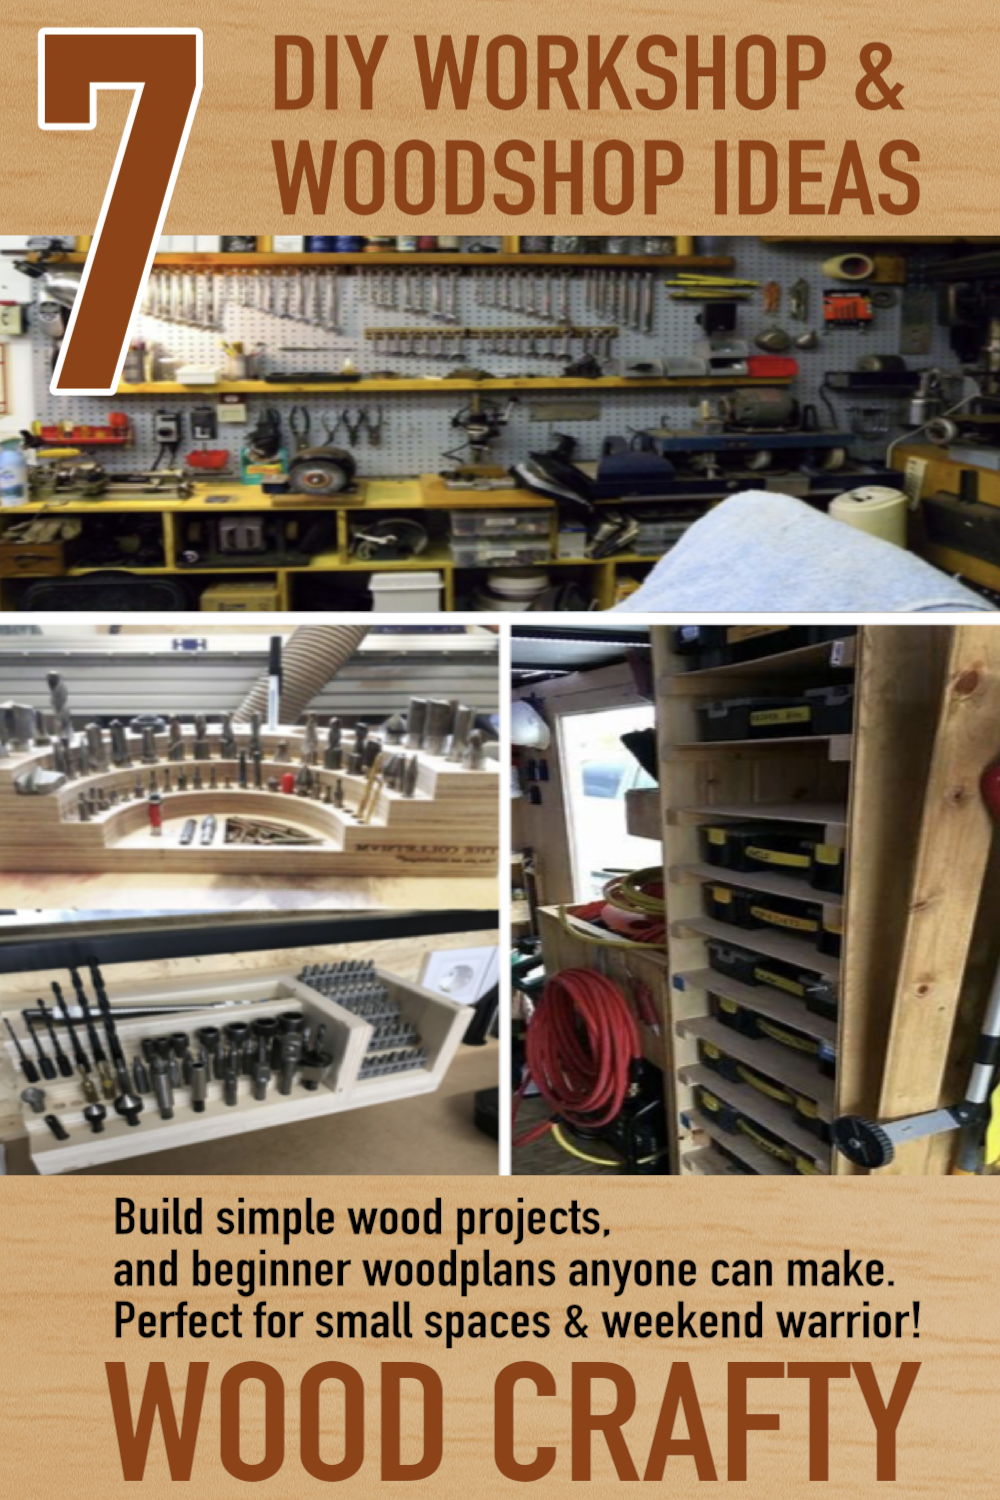
7 Small Woodworking Projects to Organize Your Woodshop

Hey there, fellow woodworker (or future woodworker)! đź‘‹
Whether your workshop is a corner of the garage or a full-on shed in the backyard, one thing’s for sure—keeping it organized makes every project way more fun.

If you’re into making stuff from wood and love things nice and tidy, this post is for you. We’re diving into 7 small woodworking projects that’ll not only boost your skills but also help you keep your shop clean and clutter-free. Let’s go!


1. Wall-Mounted Tool Rack

You know those tools you’re always reaching for—screwdrivers, hammers, pliers? Make them easy to grab with a wall tool rack.
All you need is a board, a few nails or hooks, and some screws.
Customize it to fit your favorite tools. It’s like giving your tools their own VIP parking spots. 🛠️


2. Scrap Wood Bin (with Wheels!)

Scrap wood piles up fast. Build a simple bin with casters so you can roll it around.
Use plywood or leftover 2x4s. Make a big open box, slap on the wheels, and boom—mobile scrap storage.
No more tripping over weird wood offcuts!


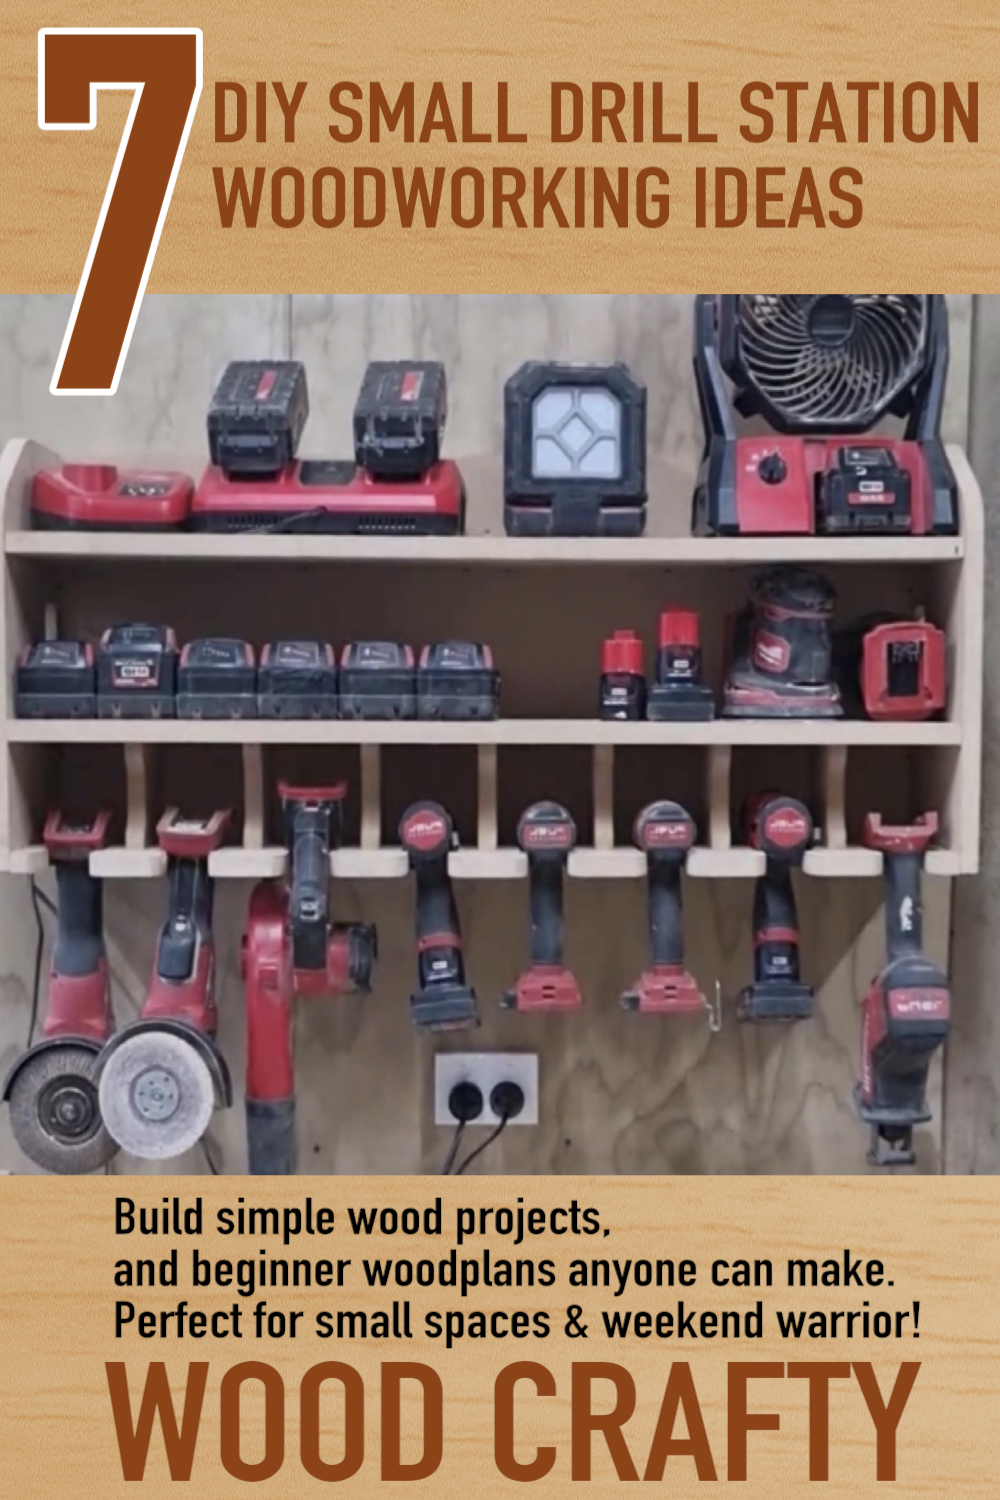
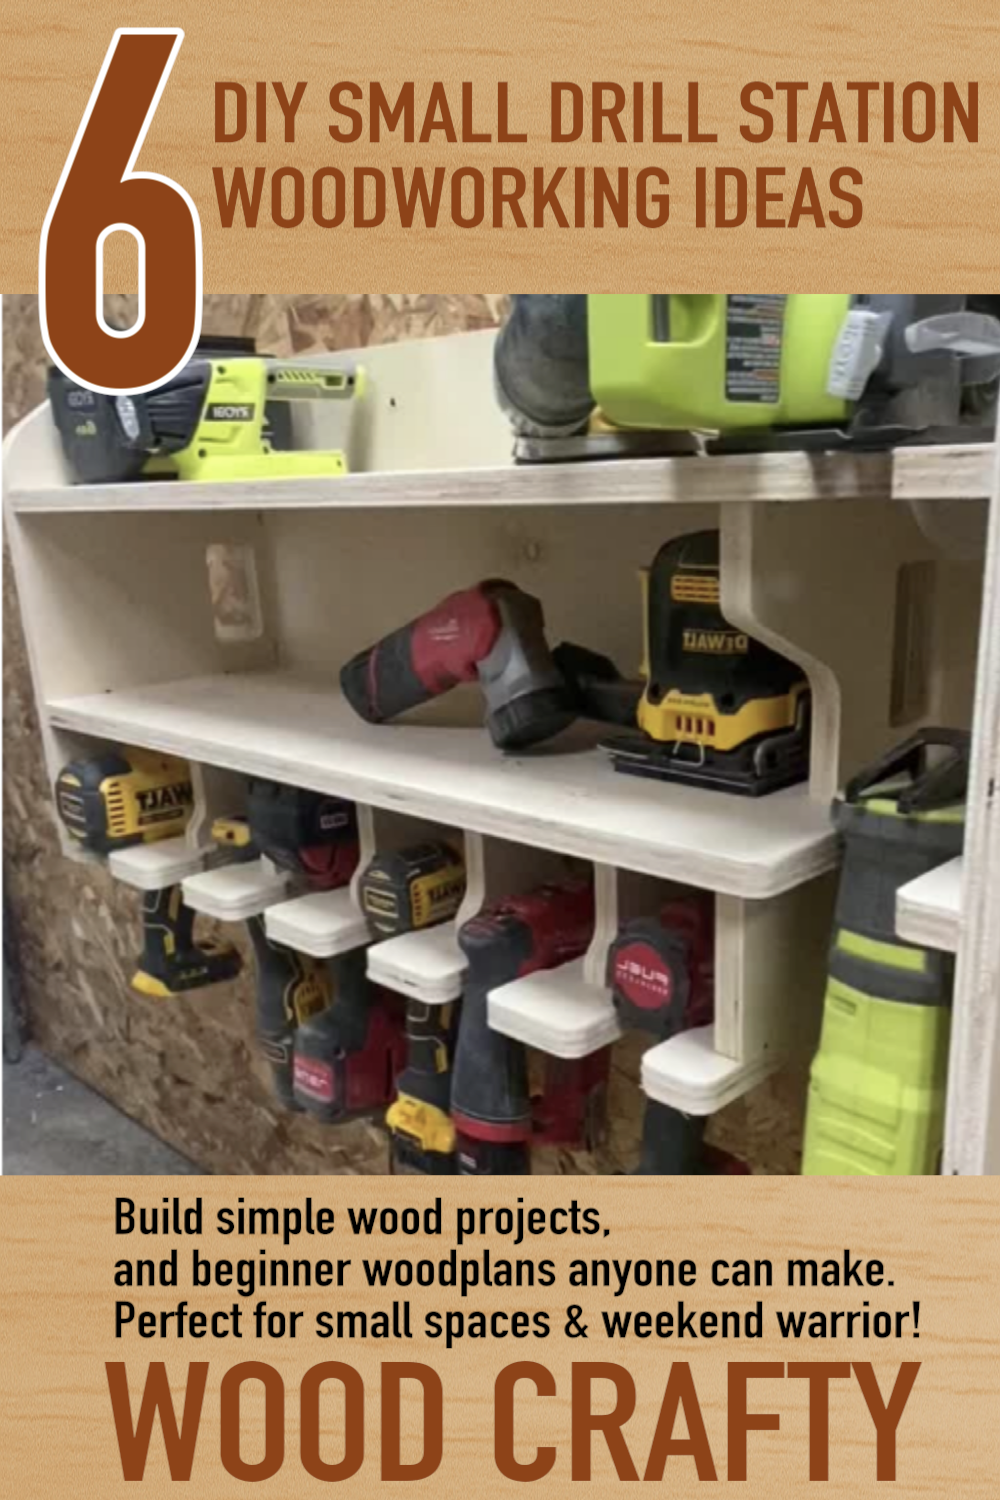
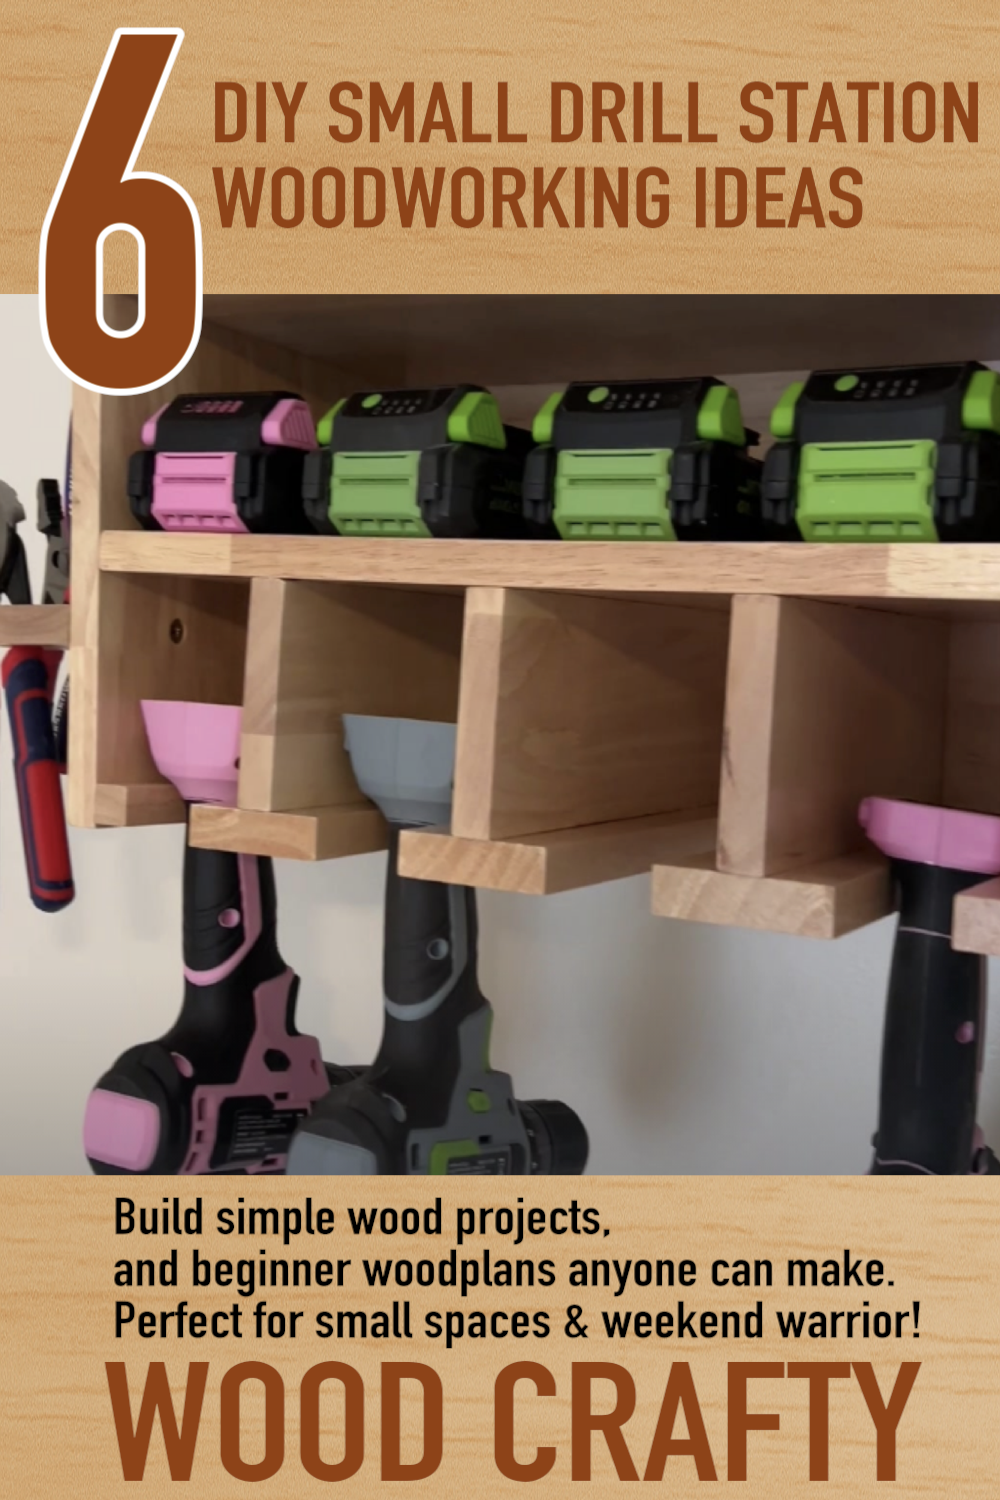
3. Drill Charging Station

Got a cordless drill? Probably more than one? Build a charging station!
This small shelf holds your drills AND has cubbies underneath for the batteries and chargers.
Mount it on the wall and keep all your drill gear in one spot—no more hunting around.


4. Sandpaper Organizer

Sandpaper gets messy fast.
Make a simple file-folder-style shelf using thin plywood or MDF.
Label each slot by grit (80, 120, 220, etc.) and keep everything easy to find.
Bonus: You’ll actually use the right grit now!


5. Workbench Caddy

Build a little tray that hangs on the side of your workbench.
Use it to hold pencils, measuring tape, glue, or even your phone while you jam out to tunes.
This tiny project packs a big punch for keeping your main work area clear.


6. Small Parts Cabinet

Screws, nails, nuts, bolts… they go EVERYWHERE.
Make a mini cabinet with tiny drawers or even reuse old jam jars in a frame you build.
Label everything and never dig through a rusty coffee can again. 🙌


7. Clamp Rack

Clamps love to live in a pile. Let’s fix that.
You can make a rack with just a few boards and some dowels or hooks.
Hang it on the wall and line up your clamps like trophies. It saves space and looks cool too.


Final Thoughts

You don’t need fancy tools to make a big difference in your shop. These small woodworking projects are quick, fun, and super useful. Try one (or all seven!) and enjoy your shop being more organized—and more awesome.

Got a favorite shop project you’ve made? Drop it in the comments—I’d love to see what you’ve built!

Happy hammering! 🔨
— Your DIY Buddy

click the image for info

7 Easy and Fun Small Woodworking Projects for Your Drill Station

Hey there, DIY enthusiasts! If you’re looking to organize your workspace and build some cool projects, you’re in the right place. A drill station is one of the best things you can add to your workshop to keep everything in order and make your projects even easier. But instead of just buying one, why not try making your own? Here are 7 small woodworking ideas that’ll help you create a handy and organized drill station!

1. Basic Drill Stand

First things first, you’ll need a solid foundation for your drill station. A simple drill stand is easy to make and will keep your drill in a secure position when you’re not using it. All you need is a piece of plywood, some screws, and a couple of pieces of wood to create a simple frame. Just screw the stand together, and you’ve got a place to safely store your drill!

Materials Needed:

  • Plywood

  • Screws

  • Wood glue

  • Drill and screws to secure

2. Drill Bit Holder

Keeping your drill bits organized can be a real hassle. Make a simple drill bit holder that attaches to your drill station to store all your bits in one spot. You can create this out of a scrap piece of wood by drilling a series of holes in it to fit your bits. It’s easy, quick, and will save you a ton of time when you’re searching for the right bit.

Materials Needed:

  • Scrap wood

  • Drill and bits (to create the holes)

  • Sandpaper for smoothing

3. Cord Storage Hook

No one likes cords that are tangled up and impossible to deal with. A simple cord storage hook is a great way to keep things neat and tidy. All you need is a small piece of wood, some screws, and a hook or two. Install it on the side of your drill station, and you’ll always have a place to hang your cords when you’re done!

Materials Needed:

  • Small piece of wood

  • Hooks or pegs

  • Screws and drill

4. Tool Shelf for Extra Storage

Sometimes, your drill station needs a little extra storage for those small tools that never seem to have a home. A small shelf mounted to the top of your station is the perfect solution. You can store screws, pliers, measuring tapes, or any other tools you need within arm’s reach. This is a simple woodworking project that adds some useful space to your drill station.

Materials Needed:

  • Small wood planks

  • Screws

  • Drill for installation

5. Clamp Rack

If you’re like most woodworkers, you’ve got a few clamps lying around that need a better storage solution. Create a simple clamp rack by attaching a long piece of wood to the side of your drill station. Then, you can hang your clamps from the rack, keeping them organized and easy to grab when you need them.

Materials Needed:

  • Wood board

  • Screws

  • Drill and screws

6. Battery Storage

If you use cordless tools, keeping track of your batteries can be tricky. Make a small shelf or box to store them safely on your drill station. You can create a divided box to keep them separated or a simple shelf with a small lip to hold them in place. This is a must-have to avoid digging through drawers looking for the right battery!

Materials Needed:

  • Scrap wood

  • Wood glue

  • Screws (optional)

7. Dust Collection Tray

Drill stations can get a little messy with all the sawdust flying around. A dust collection tray is an easy project that can help keep things tidy. You can make this out of plywood and attach it underneath your drill station. It’ll catch dust and debris, making cleanup way easier when you’re done with your projects.

Materials Needed:

  • Plywood

  • Screws

  • Sawdust collection system (optional)


Final Thoughts: Building a DIY drill station is a great way to keep your workspace organized while also improving your workflow. With just a few basic materials and tools, you can create a station that holds all your drill bits, cords, tools, and more. Whether you’re an experienced woodworker or just getting started, these 7 small woodworking projects will definitely help you set up a more functional and organized workspace. Happy building!

4o mini

You have not enough Humanizer words left. Upgrade your Surfer plan.
Je zei:
another one
ChatGPT zei:

7 Cool DIY Woodworking Projects for Your Drill Station

Hey DIYers! If you’re looking to make your workshop more organized and efficient, building a drill station is a great way to start. Instead of buying one, why not take on some small woodworking projects that’ll make your drill station not only more useful but also fun to build? Below are 7 simple and awesome ideas you can try for your very own DIY drill station. Let’s get started!

1. Drill and Tool Organizer

One of the best ways to maximize your drill station is by creating a tool organizer. This project will give your drills, drivers, and smaller hand tools their own special places. All you need is a small piece of plywood or MDF, and a few wooden dowels or dividers. Cut out different-sized slots or holes to keep all your tools neatly arranged and easy to grab.

Materials Needed:

  • Plywood or MDF

  • Wood glue or screws

  • Dowels or scrap wood for dividers

2. Drill Bit Rack

No one likes digging through a drawer to find the right drill bit. A drill bit rack is a simple yet super useful addition to your drill station. You can build a rack by drilling holes into a wooden board. Arrange them by size so that you can easily see all your bits. It’s a quick project that’ll save you a lot of time!

Materials Needed:

  • Scrap wood or small board

  • Drill and drill bits

  • Wood glue or screws

3. Cordless Drill Charging Station

If you use cordless drills, having a designated charging station is essential. Instead of plugging and unplugging every time, why not build a spot just for charging? Create a small shelf with cut-out slots to hold your drill while it charges. Add some power strips and you’ll have an efficient and organized charging area.

Materials Needed:

  • Small wood planks

  • Power strip

  • Screws and drill

  • Sandpaper for smoothing edges

4. Drawer Storage for Drill Accessories

Sometimes you need to store smaller accessories like screws, nails, and extra bits. A small drawer unit is a perfect way to keep these items handy without cluttering up your workspace. You can easily make a simple drawer system from plywood and organize your accessories into labeled sections. It’s a project that really helps cut down on the mess!

Materials Needed:

  • Plywood or MDF

  • Drawer slides

  • Small dividers or boxes for sorting

5. Magnetic Tool Holder

This one’s super simple and super effective! A magnetic tool holder will keep your small metal tools like screwdrivers, pliers, and wrenches easily accessible. You can build a basic frame with a strip of metal and a strong magnet. Mount it on your drill station, and you’ll have a handy spot for your essential tools.

Materials Needed:

  • Metal strip or bar

  • Strong magnets

  • Wood for mounting

6. Screwdriver and Bit Rack

This project is another way to keep your small hand tools and drill accessories organized. Build a rack to hold all your screwdrivers and drill bits in a single place. You can customize the size and shape to fit all your tools, with little slots or hooks for easy access.

Materials Needed:

  • Wood planks

  • Hooks or dowels

  • Screws for installation

7. Dust Collection Tray

Woodworking is messy, and drills are no exception. Creating a dust collection tray for your drill station is an easy way to make cleanup a breeze. You can build a small, shallow tray out of plywood, and attach it to the base of your drill station. It’ll catch any dust and debris from drilling, so you don’t have to worry about cleaning up after every project!

Materials Needed:

  • Plywood

  • Screws

  • Sawdust collection bag (optional)


Wrap Up: With these 7 small woodworking projects, you can turn your drill station into an organized, efficient, and fun space to work in. Each project is simple to make and will help keep all your tools and accessories within reach, saving you time and effort in the long run. So grab your wood, your drill, and let’s get to building—your drill station is about to be a lot more awesome!

Hey there, DIY enthusiasts! If you’re looking to organize your workspace and build some cool projects, you’re in the right place. A drill station is one of the best things you can add to your workshop to keep everything in order and make your projects even easier. But instead of just buying one, why not try making your own? Here are 7 small woodworking ideas that’ll help you create a handy and organized drill station!

1. Basic Drill Stand

First things first, you’ll need a solid foundation for your drill station. A simple drill stand is easy to make and will keep your drill in a secure position when you’re not using it. All you need is a piece of plywood, some screws, and a couple of pieces of wood to create a simple frame. Just screw the stand together, and you’ve got a place to safely store your drill!

Materials Needed:

  • Plywood

  • Screws

  • Wood glue

  • Drill and screws to secure

2. Drill Bit Holder

Keeping your drill bits organized can be a real hassle. Make a simple drill bit holder that attaches to your drill station to store all your bits in one spot. You can create this out of a scrap piece of wood by drilling a series of holes in it to fit your bits. It’s easy, quick, and will save you a ton of time when you’re searching for the right bit.

Materials Needed:

  • Scrap wood

  • Drill and bits (to create the holes)

  • Sandpaper for smoothing

3. Cord Storage Hook

No one likes cords that are tangled up and impossible to deal with. A simple cord storage hook is a great way to keep things neat and tidy. All you need is a small piece of wood, some screws, and a hook or two. Install it on the side of your drill station, and you’ll always have a place to hang your cords when you’re done!

Materials Needed:

  • Small piece of wood

  • Hooks or pegs

  • Screws and drill

4. Tool Shelf for Extra Storage

Sometimes, your drill station needs a little extra storage for those small tools that never seem to have a home. A small shelf mounted to the top of your station is the perfect solution. You can store screws, pliers, measuring tapes, or any other tools you need within arm’s reach. This is a simple woodworking project that adds some useful space to your drill station.

Materials Needed:

  • Small wood planks

  • Screws

  • Drill for installation

5. Clamp Rack

If you’re like most woodworkers, you’ve got a few clamps lying around that need a better storage solution. Create a simple clamp rack by attaching a long piece of wood to the side of your drill station. Then, you can hang your clamps from the rack, keeping them organized and easy to grab when you need them.

Materials Needed:

  • Wood board

  • Screws

  • Drill and screws

6. Battery Storage

If you use cordless tools, keeping track of your batteries can be tricky. Make a small shelf or box to store them safely on your drill station. You can create a divided box to keep them separated or a simple shelf with a small lip to hold them in place. This is a must-have to avoid digging through drawers looking for the right battery!

Materials Needed:

  • Scrap wood

  • Wood glue

  • Screws (optional)

7. Dust Collection Tray

Drill stations can get a little messy with all the sawdust flying around. A dust collection tray is an easy project that can help keep things tidy. You can make this out of plywood and attach it underneath your drill station. It’ll catch dust and debris, making cleanup way easier when you’re done with your projects.

Materials Needed:

  • Plywood

  • Screws

  • Sawdust collection system (optional)


Final Thoughts: Building a DIY drill station is a great way to keep your workspace organized while also improving your workflow. With just a few basic materials and tools, you can create a station that holds all your drill bits, cords, tools, and more. Whether you’re an experienced woodworker or just getting started, these 7 small woodworking projects will definitely help you set up a more functional and organized workspace. Happy building!

Hey there, DIYer! đź‘‹

If you’re into woodworking (or just starting out), your drill is probably one of your most used tools. But where do you store it when you’re not using it? It’s time to get your drill station organized!

Here are 6 small woodworking projects that will help you create a more efficient and organized drill station. They’re easy, fun to build, and super useful for keeping your workspace tidy. Let’s get started!


1. Wall-Mounted Drill Holder

Tired of your drill just sitting on the workbench? Make a simple wall-mounted holder to keep your drill off the surface. Cut slots in a piece of wood to fit your drill’s handle, and mount it on the wall.

đź§° Tools: Drill, jigsaw
🪵 Materials: Plywood or any scrap wood
đź’ˇ Tip: Add a small lip underneath to catch batteries or other small items.


2. Drill Bit Organizer Tray

Drill bits can easily get lost. Make a tray with holes for each bit, so they stay neatly in place. You can drill custom-sized holes in a block of wood or create a simple wooden insert for a drawer.

đź§° Tools: Drill, ruler, sandpaper
🪵 Materials: Pine wood or any scrap wood
đź’ˇ Tip: Label each hole with a marker or sticker to keep track of sizes.


3. Battery Charging Station

If you have cordless drills, chances are you’ve got a bunch of chargers and batteries lying around. Build a charging station with slots for your batteries and a spot to plug in the chargers. This will help keep your drill station neat and organized.

đź§° Tools: Drill, saw, screwdriver
🪵 Materials: Plywood, power strip
đź’ˇ Tip: Mount the power strip inside the station to hide the wires and keep things tidy.


4. Portable Drill Caddy

Need to carry your drill, bits, and accessories around? Build a small caddy with a handle to make it easy to grab and go. It’s like a mini toolbox just for your drill essentials.

đź§° Tools: Saw, drill, sander
🪵 Materials: 1×4 boards or any scrap wood
đź’ˇ Tip: Add a little compartment for screws or small items to keep everything in one place.


5. Pegboard for Your Drill Station

A pegboard is a simple and affordable way to organize your tools. Mount it behind your drill station to hang your drill bits, drill accessories, and other tools. It keeps everything visible and within reach.

đź§° Tools: Drill, level
🪵 Materials: Pegboard, spacers, hooks
💡 Tip: Plan your layout with painter’s tape before installing the hooks to make sure everything fits just right.


6. Scrap Wood Drill Bit Tray

Got some leftover pieces of wood lying around? Don’t throw them away! Turn them into a neat little drill bit tray by drilling holes for each size. You can even make it a tiered tray to keep longer and shorter bits separate.

đź§° Tools: Drill, saw
🪵 Materials: Scrap wood
đź’ˇ Tip: Add small magnets to the tray to keep metal bits in place.


Final Thoughts

You don’t need a huge workshop to stay organized. These small projects are fun to build and make a big difference in how you work. Choose one to start with, and soon your drill station will be organized and ready for action!

Got your own drill station ideas or need help with a project? Drop a comment below—I’d love to hear from you! 🪚🔧

Hey there, DIYers! đź‘‹

If you love woodworking or just getting into it, one of the most-used tools in your shop is probably your drill. Whether you’re building birdhouses or fixing furniture, your drill is a must-have. So why not give it a proper home? 🛠️

Here are 6 small woodworking projects you can make to organize and upgrade your drill station. These are great for beginners and don’t take much space (or cash). Let’s dive in!


1. Wall-Mounted Drill Holder

Tired of your drill laying around? Build a simple wall-mounted rack to hold your drills. You just need a few pieces of plywood and a jigsaw to cut out slots for the handles to slide into.

đź§° Tools: Drill (obviously), jigsaw, screws
🪵 Materials: Plywood, wood glue
đź’ˇ Pro Tip: Add a small lip underneath to catch batteries too!


2. Drill Bit Organizer Drawer

Drill bits have a way of disappearing, right? Make a drawer with custom holes to keep your bits organized. You can drill different sizes into a block of wood or use a drawer insert to sort everything by type.

đź§° Tools: Drill press (or handheld drill), sander
🪵 Materials: Pine board or scrap wood
💡 Pro Tip: Label each hole with a marker so you know what’s what.


3. Battery Charging Station

If you’ve got cordless drills, you probably have a pile of chargers and batteries. Tame the mess by building a battery charging station with cutouts for your chargers and slots for batteries.

đź§° Tools: Drill, jigsaw, tape measure
🪵 Materials: Plywood, power strip
đź’ˇ Pro Tip: Mount the power strip inside the station for a clean look.


4. Portable Drill Caddy

Need to move around while working? Build a small caddy with a handle so you can carry your drill, bits, and extras with you. It’s like a toolbox, but made just for your drill gear.

đź§° Tools: Drill, saw, sander
🪵 Materials: 1x4s, wood glue
đź’ˇ Pro Tip: Add a little drawer or cup for screws and bits.


5. Pegboard Backdrop

A pegboard behind your drill station gives you lots of flexibility. Hang up drill bits, sanding attachments, clamps, or anything else you use a lot. It’s easy, cheap, and super useful.

đź§° Tools: Drill, level
🪵 Materials: Pegboard, spacers, hooks
💡 Pro Tip: Use painter’s tape to plan your layout before installing hooks.


6. Scrap Wood Bit Tray

Got leftover wood pieces? Don’t toss them! Cut them into small blocks and drill holes for your bits. You can even make a tiered tray with different levels for short and long bits.

đź§° Tools: Drill, miter saw
🪵 Materials: Scrap wood
đź’ˇ Pro Tip: Glue magnets inside the tray to help hold metal bits in place.


Final Thoughts

You don’t need a giant workshop to stay organized. These small projects are fun to build and super handy to have. Start with one, and soon your drill station will be looking sharp—and so will your projects!

Got your own ideas or want help planning one? Drop a comment! 🪚🔧

Hey there! If you’re looking to dive into woodworking but aren’t ready to build a whole house or anything crazy, I’ve got some awesome ideas for small projects that are fun and easy to make. Whether you’re a beginner or just love working with wood, these 9 simple woodworking projects will keep you busy and help you create some really cool stuff for your home. Let’s get started!

1. Wooden Picture Frame

If you want to add a personal touch to your photos, try making a wooden picture frame. All you need is some scrap wood, a saw to cut the pieces to size, and a little glue or nails. You can paint or stain it however you like to match your room’s vibe. Plus, it’s a great gift idea!

2. Floating Shelf

A floating shelf is a perfect way to display books, plants, or cool knick-knacks. It’s super simple to make—just cut a board to the size you want, then use brackets to mount it on the wall. You can even get creative and use reclaimed wood for a rustic look.

3. Wooden Coasters

Make your own coasters with small pieces of wood! Just cut them into squares or circles and then sand them smooth. You can leave them natural or add a fun design by painting or staining them. These are a great way to protect your furniture and add a personal touch to your home.

4. DIY Plant Stand

Do you love plants? Why not make a cute little stand to show them off? You can make a simple three-legged stand with a few pieces of wood and a bit of glue. This project is a great beginner woodworking project and will add some greenery to your space.

5. Wooden Tray

Want a custom tray for serving breakfast in bed or just organizing your desk? Grab a small piece of plywood, cut it into your desired size, and add some handles to the sides. It’s super easy, and you can customize it with paint or stain to make it look even cooler.

6. Wooden Candle Holders

Candle holders are an easy woodworking project that can add some ambiance to any room. You just need some small blocks of wood, a drill to make the hole for the candle, and some paint or wood finish. You can even make a whole set of them in different sizes!

7. Mini Wooden Bench

A small wooden bench is perfect for a porch, hallway, or even as extra seating in your living room. It doesn’t require too many materials or complex cuts—just some wood for the seat and legs, plus screws to put it together. This one’s a little more advanced but still a manageable project for beginners.

8. Wooden Key Holder

Stop losing your keys! A simple wooden key holder with hooks can help you keep track of your keys while also looking cute on the wall. Just get a small piece of wood, add some hooks, and paint it however you like. It’s functional and stylish!

9. Birdhouse

If you love wildlife, a birdhouse is a fun and easy project. You’ll need a small piece of plywood, some nails, and a little paint. It’s a great way to create a cozy spot for birds to hang out in your backyard. Plus, watching birds come and go is super relaxing!

Final Thoughts

These small woodworking projects are perfect for beginners, and they’re a great way to practice your skills while creating something useful or decorative for your home. Whether you’re making a wooden picture frame, a plant stand, or a birdhouse, you’ll be surprised at how satisfying it is to work with your hands and create something unique. So, grab your tools and get started on your next DIY project!

Happy woodworking! ✂️🛠️ more info >>

9 Fun Small Woodworking Projects You Can Do at Home

If you’ve ever dreamed of having a cozy spot in your backyard where you can relax, entertain friends, or enjoy a book in peace, building a gazebo is the perfect small woodworking project for you! A backyard gazebo can add charm and function to any outdoor space, and the best part? You can totally build it yourself!

Here are 9 awesome ideas to get you started on creating your own backyard gazebo. Whether you’re a beginner or a DIY pro, there’s something here for everyone!

1. Start Small with a Simple Design

If you’re new to woodworking, don’t worry! You can start with a simple, basic design for your gazebo. A small, open structure with four posts and a roof is all you need to get started. It’s not as complicated as it sounds, and it’ll give you the confidence to move on to more intricate projects later.

2. Round Gazebo with a Rustic Twist

A circular or octagon-shaped gazebo can add a rustic vibe to your yard. You’ll need to build the frame first, using strong wood like cedar or pine. Adding a thatched roof or wooden shingles can make it even more charming. It’s a great project if you want something that stands out.

3. Gazebo with Built-In Benches

Want to make your gazebo extra cozy? Add built-in benches around the inside! Not only does it save space, but it also gives you a great place to sit and chat with friends or enjoy a quiet afternoon. These benches are simple to make and add a practical touch to your structure.

4. Wooden Gazebo with a Trellis Roof

For a garden-inspired look, you can design a gazebo with a trellis-style roof. The open woodwork allows climbing plants like ivy or wisteria to grow, giving your gazebo a natural, leafy feel. This idea works really well if you love gardening and want your outdoor space to blend with nature.

5. Modern Gazebo with Clean Lines

If you prefer a sleek, modern look, a gazebo with clean lines and minimal details might be your style. Opt for a rectangular shape with straight, simple posts. You can paint the structure in neutral colors like white or gray to make it look contemporary. This is an easy and stylish project for anyone who loves modern design.

6. Gazebo with a Fire Pit

A backyard gazebo is the perfect place for a fire pit. Imagine cozying up with friends and family around the fire on a chilly evening! Building a fire pit into the center of your gazebo is an exciting woodworking project. Just make sure to check your local regulations to ensure it’s safe to have one in your area.

7. Tiny Gazebo for a Cozy Retreat

If you don’t have a huge backyard, no problem! You can build a small gazebo that’s just big enough for a bench or a couple of chairs. It’s the perfect little retreat where you can escape from the hustle and bustle. A smaller project means you’ll be able to complete it in less time, too!

8. Gazebo with a Porch Swing

For ultimate relaxation, why not add a porch swing inside your gazebo? Building a sturdy frame for a swing is a fun and simple woodworking project. It’ll create the perfect spot for reading, relaxing, or watching the sunset. Add a few cushions and some twinkling fairy lights for extra charm.

9. Gazebo with a Skylight

For a unique touch, consider adding a skylight to the roof of your gazebo. This lets in natural light during the day and gives you a view of the stars at night. It’s a slightly more advanced project, but if you’re up for the challenge, it can make your gazebo feel even more special.

Tips for Your DIY Gazebo Project:

  • Plan Ahead: Before starting, sketch out your design and gather all your materials. You’ll need wood, nails, screws, and roofing materials. Make sure you have the right tools, like a saw, drill, hammer, and measuring tape.

  • Measure Twice, Cut Once: Accuracy is key! Double-check your measurements to avoid mistakes and wasted materials.

  • Use Pressure-Treated Wood: Since your gazebo will be outside, it’s important to use wood that’s treated to resist moisture and pests.

  • Take Your Time: Building a gazebo might take a few weekends, depending on how much time you can dedicate. Don’t rush it—enjoy the process and feel proud of your creation when it’s done!


Building a backyard gazebo is a rewarding and fun DIY project that will transform your outdoor space. Whether you go for a simple design or something more elaborate, you’ll end up with a beautiful, functional area to enjoy for years to come. So grab your tools, gather your materials, and get started on your very own small woodworking project today! Happy building! more info>>

How to Build a Backyard Gazebo – 9 Ideas for Small Woodworking Projects

Hey there, fellow DIYers! If you love working with wood and want to build something cool for your backyard, a gazebo is a fantastic project to tackle. Not only will it add a beautiful touch to your garden, but it’s also a great place to relax or entertain friends and family. So, let’s dive into how to build a backyard gazebo with 7 creative ideas you can try.

1. Classic Wooden Gazebo

The first idea is the classic wooden gazebo that we all picture when we think of a peaceful backyard retreat. This style typically has a simple design with a circular or octagonal shape. You can keep it traditional with sloped rooflines, wooden railings, and open sides. A nice touch would be adding benches inside for extra seating!

How to Build:

  • Start by creating the base frame using pressure-treated wood for durability.

  • Set up the main posts and beams to support the roof structure.

  • Add rafters and attach shingles or wooden slats for the roofing.

  • Finish with railings or an open design, depending on your style.

2. Modern Minimalist Gazebo

For those who prefer a clean, modern look, this minimalist gazebo is for you. It’s sleek, stylish, and has fewer decorative elements but still provides all the shade and comfort you need. Think straight lines, flat roofing, and simple wooden beams.

How to Build:

  • Use straight wood beams and metal connectors for a more industrial feel.

  • Go with a flat roof design and cover it with corrugated sheets or wooden planks.

  • Keep the structure open, with no railings or extra decorations, for a more airy, modern feel.

3. Rustic Garden Gazebo

If you’re going for that rustic, charming vibe in your garden, a rustic wooden gazebo will add loads of character. This one usually includes rough-hewn timber, maybe some vine-covered walls, and a cozy, old-timey feel.

How to Build:

  • Choose reclaimed wood or rough-cut lumber for that weathered look.

  • Create an open-frame design or add a wooden slatted roof.

  • Add simple touches like hanging planters or a wooden swing for a rustic touch.

4. Enclosed Gazebo

For a little more privacy, an enclosed gazebo could be the perfect project. You can use mesh or wooden panels to close in the sides. It’s a great option for areas where you want to shield yourself from the wind or bugs.

How to Build:

  • Start with a solid frame and build your base.

  • Install wooden panels or mesh fabric for the sides.

  • For the roof, go with a sloped wooden roof or a sturdy canopy.

  • Add a door or curtains for a cozy, enclosed feel.

5. Pergola-Style Gazebo

A pergola-style gazebo has a more open design than most gazebos, with a lattice or beam-like roof that lets some light through. It’s perfect if you want a shaded area but don’t mind some sun peeking through. Add some climbing plants to really make it pop.

How to Build:

  • Set up your posts and connect them with beams.

  • Build a lattice or grid-like structure for the roof.

  • You can even add cross beams to create a more intricate look.

  • Hang plants or add vines to bring in a little nature!

6. DIY Pallet Gazebo

Looking for something budget-friendly? If you have a few wooden pallets lying around, why not use them to build a cool DIY gazebo? It’s an awesome way to get creative with repurposed materials.

How to Build:

  • Use pallets to form the floor or base of your gazebo.

  • For the walls, you can stack pallets or cut them down to create simple panels.

  • Use a combination of wood beams and pallets for the roof structure.

  • This is a fun way to upcycle and create a functional space.

7. Tiny Gazebo Retreat

If you’re short on space but still want a gazebo, a small or tiny gazebo is the way to go. It’s perfect for compact backyards and still gives you the cozy retreat you’re looking for. Keep it simple and elegant, with a smaller frame and cozy features.

How to Build:

  • Use a smaller base and opt for a simple design.

  • Focus on clean lines, minimal decoration, and just enough space for a couple of chairs or a small table.

  • A lightweight roof and small posts will give it that perfect tiny gazebo vibe.


Tips for Your Gazebo Project:

  • Pick the right wood: Pressure-treated wood, cedar, or redwood are great for outdoor projects since they resist weathering.

  • Measure twice, cut once: This old woodworking rule helps prevent mistakes. Double-check your measurements before you make any cuts.

  • Add your own style: Whether you’re using a classic design or something modern, don’t be afraid to personalize your gazebo. Paint it your favorite color, add outdoor lights, or hang some lanterns.

  • Keep safety in mind: Always wear protective gear like goggles and gloves. Using tools safely should be your top priority.


That’s it! These 7 backyard gazebo ideas should give you plenty of inspiration for your next woodworking project. Building a gazebo might take some time, but trust me, it’ll be totally worth it when you can sit back, relax, and enjoy your beautiful new space. Happy building!

CLICK PICTURE BELOW